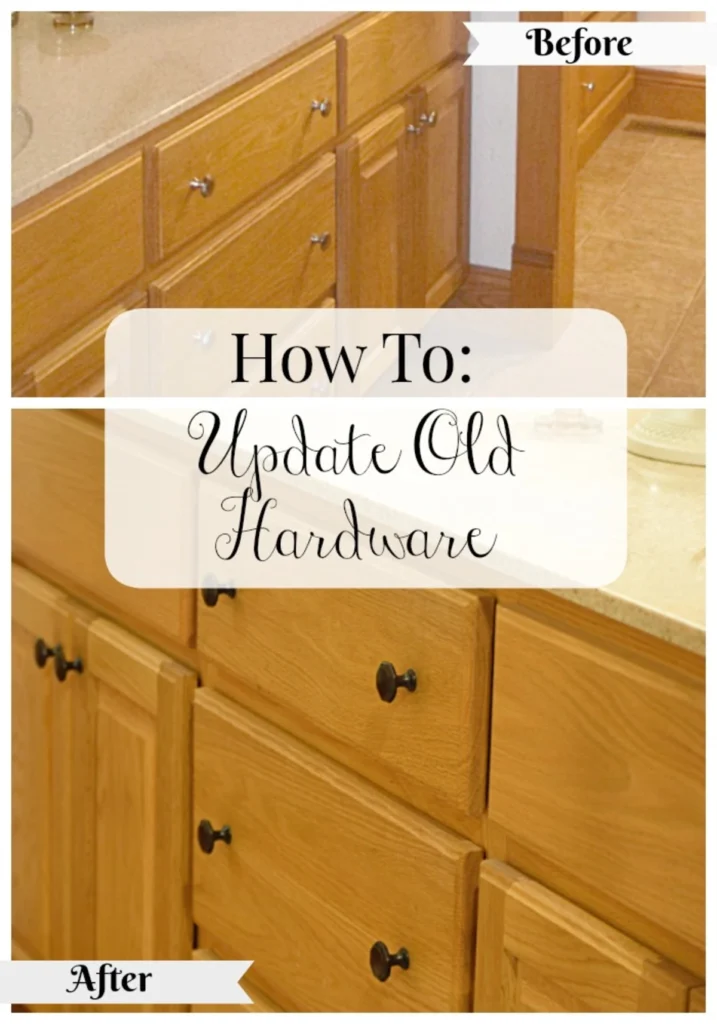
Refreshing the look of your cabinets and furniture doesn’t have to mean a full remodel. Swapping outdated knobs, pulls, and hinges for modern hardware is an affordable, high-impact project that anyone can tackle. In this article, you’ll discover why replacing old hardware breathes new life into your home, how to choose the perfect pieces, step-by-step installation tips, and simple maintenance ideas—all in easy-to-follow language.
Why Replacing Hardware Makes a Big Difference
Old or mismatched hardware can date your entire space, no matter how stylish your paint color or countertops may be. Here’s why a hardware upgrade matters:
- Instant Visual Impact: New knobs and pulls draw the eye, turning plain cabinets and furniture into focal points.
- Cohesive Style: Matching finishes and designs across your kitchen, bathroom, or bedroom create a unified look.
- Improved Functionality: Worn hinges and loose knobs can make opening drawers and doors a struggle; quality hardware feels solid and smooth.
- Budget-Friendly Makeover: High-end hardware costs a fraction of what you’d spend on custom cabinetry or new furniture.
By focusing on hardware, you maximize style and usability without breaking the bank.
Choosing the Right Hardware for Your Style
Before ordering, consider these factors to ensure your new hardware complements your décor:
1. Finish: Polished brass, matte black, satin nickel, and oil-rubbed bronze are popular choices. Think about your existing faucets, light fixtures, and finishes to keep a consistent palette.
2. Size and Proportion: Measure your current back-to-back knob spacing (often 3”, 4”, or 6”) so new pulls fit without extra drilling. Larger cabinet doors may benefit from longer pulls, while small drawers look best with knobs or slim handles.
3. Shape and Detail: Sleek, linear pulls suit modern spaces, whereas ornate knobs and cup pulls fit traditional or farmhouse styles.
4. Material: Solid brass or zinc alloy hardware is more durable than plastic or low-grade metals. Ceramic and glass accents can add charm to dressers or wardrobes.
Don’t be afraid to order a few samples first. Holding various options in your hand helps you visualize the final look.
Preparing for Your Hardware Swap
A successful upgrade starts with careful preparation:
– Gather Tools: Gather a screwdriver or power drill, a spirit level, measuring tape, painter’s tape, and a pencil.
– Label Components: While taking off the old fixtures, place masking tape beside each hole and label it with the knob or handle size to avoid confusion later.
– Clean Surfaces: Wipe cabinet fronts and furniture faces with a mild cleaner to remove grease or dust before installing new hardware.
– Patch Extra Holes: If your new hardware doesn’t align with existing holes, fill old holes using wood filler or matching putty. Sand the area smooth once it dries.
These steps ensure a streamlined installation and professional-looking results.
Step-by-Step Replacement Guide
1. Remove Old Hardware
Unscrew handles, knobs, and hinges using your drill or screwdriver.
Keep screws if you plan to reuse them—otherwise, toss with the old hardware.
2. Fill or Adjust Holes
For mismatched spacing, use wood filler in unused holes.
Let the filler dry completely before sanding flush.
3. Mark New Hardware Placement
Measure and mark hole locations with a pencil and level.
Apply painter’s tape over the surface to minimize wood splinters during drilling.
4. Drill Pilot Holes (if needed)
Select a drill bit that’s just a bit narrower than the screws you’ll be using.
Drill carefully to avoid cracking veneer or paint.
5. Attach New Hardware
Insert screws from the inside and align your knobs or pulls.
Tighten gently; over-torquing can strip the screw hole.
6. Rehang Doors (for hinges)
If you replaced hinges, hold the door in place and line up the hinge leaf with existing mortises.
Secure screws and test the door swing before moving on.
Following this methodical approach makes the process quick—even for beginners.
Finishing Touches and Maintenance
Once your hardware is in place, elevate the look and prolong its lifespan:
– Polish and Seal: Wipe metal hardware with a soft cloth and apply a protective sealant for matte or antique finishes.
– Protect Surrounding Surfaces: Use felt bumpers inside cabinets to prevent hardware from scratching interiors.
– Regular Cleaning: Dust knobs and pulls weekly. Use a mild soap solution for fingerprints or cooking residues.
– Tighten Annually: Check screws each year and retighten to keep hardware secure.
These little habits keep your cabinets and furniture looking fresh for years.
Conclusion
Upgrading your cabinets and furniture by replacing old hardware delivers an instant style boost and makes daily use more enjoyable. By choosing the right finishes, preparing carefully, and following a straightforward installation process, you can achieve professional-quality results without calling a contractor. With minimal effort and investment, your home will feel refreshed, cohesive, and uniquely yours. Ready for your next DIY weekend? Gather your favorite hardware samples and transform your space one knob at a time!
More info visit, pvc board – gstarboard


